Please make sure you install and activate the child theme.
First, search and download the font you want. For this example, we will use the “Coffee Soda” font:
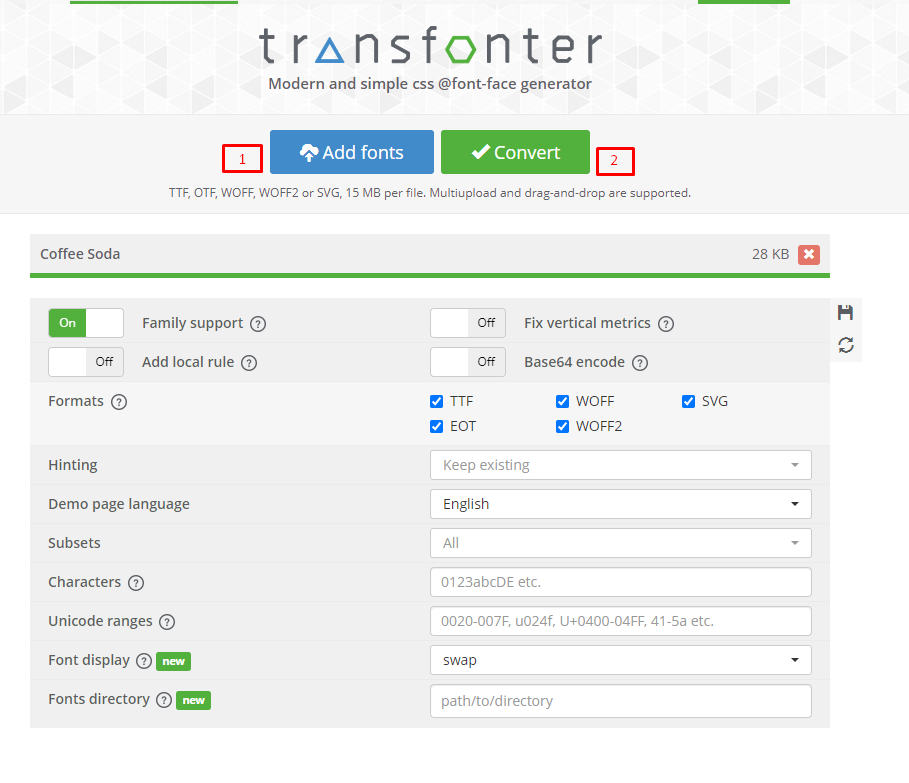
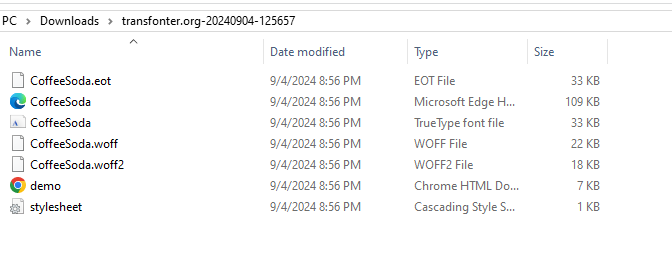
Second, you need to generate the custom font to web fonts. You can use a similar tool like this( https://transfonter.org/
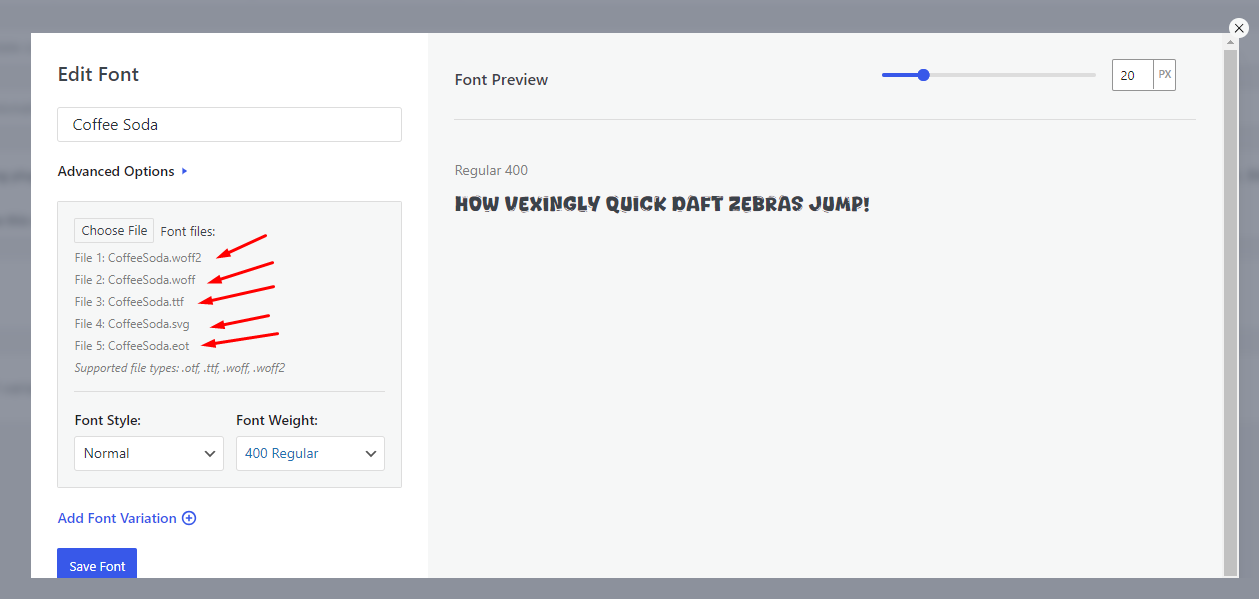
Third, add a new plugin “Custom Fonts – Host Your Fonts Locally” then install and activate. This will make your life easier when uploading a custom font than creating it manually.
Fourth, add the Coffee Soda font to the “Custom Fonts – Host Your Fonts Locally” plugin. Add the font name and upload the corresponding file to the font variation.
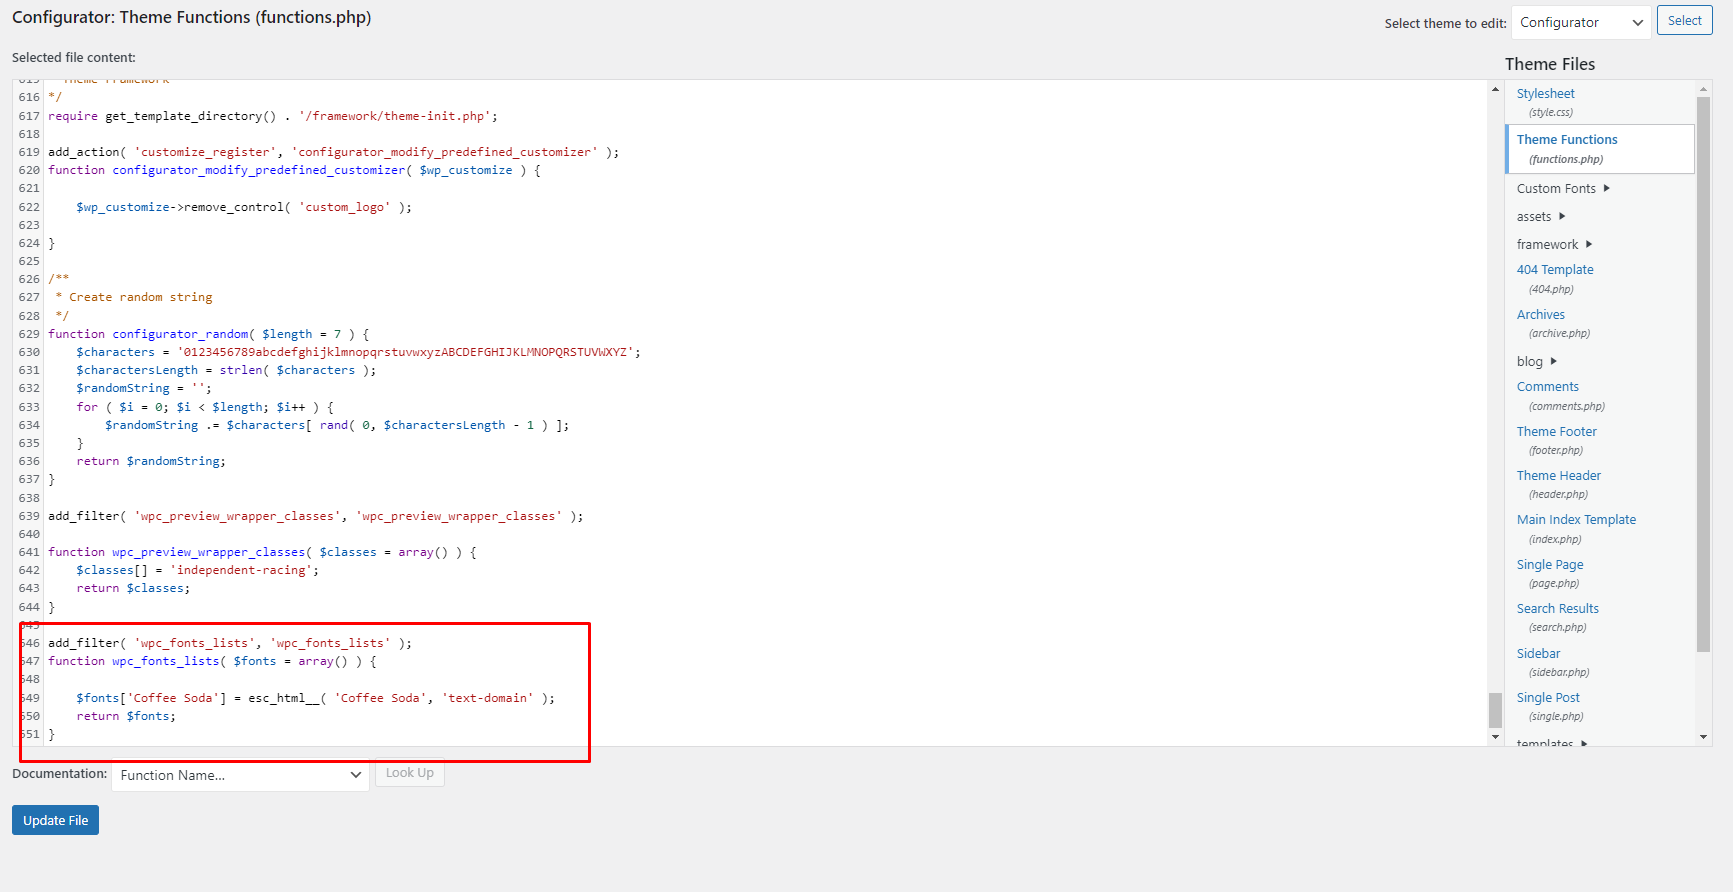
Fifth, add the below code in the child theme functions.php file, It adds the custom fonts to the select dropdown. It appears on the allowed fonts list.
add_filter( 'wpc_fonts_lists', 'wpc_fonts_lists' );
function wpc_fonts_lists( $fonts = array() ) {

$fonts['MonoLisa'] = esc_html__( 'MonoLisa', 'text-domain' );
return $fonts;
}
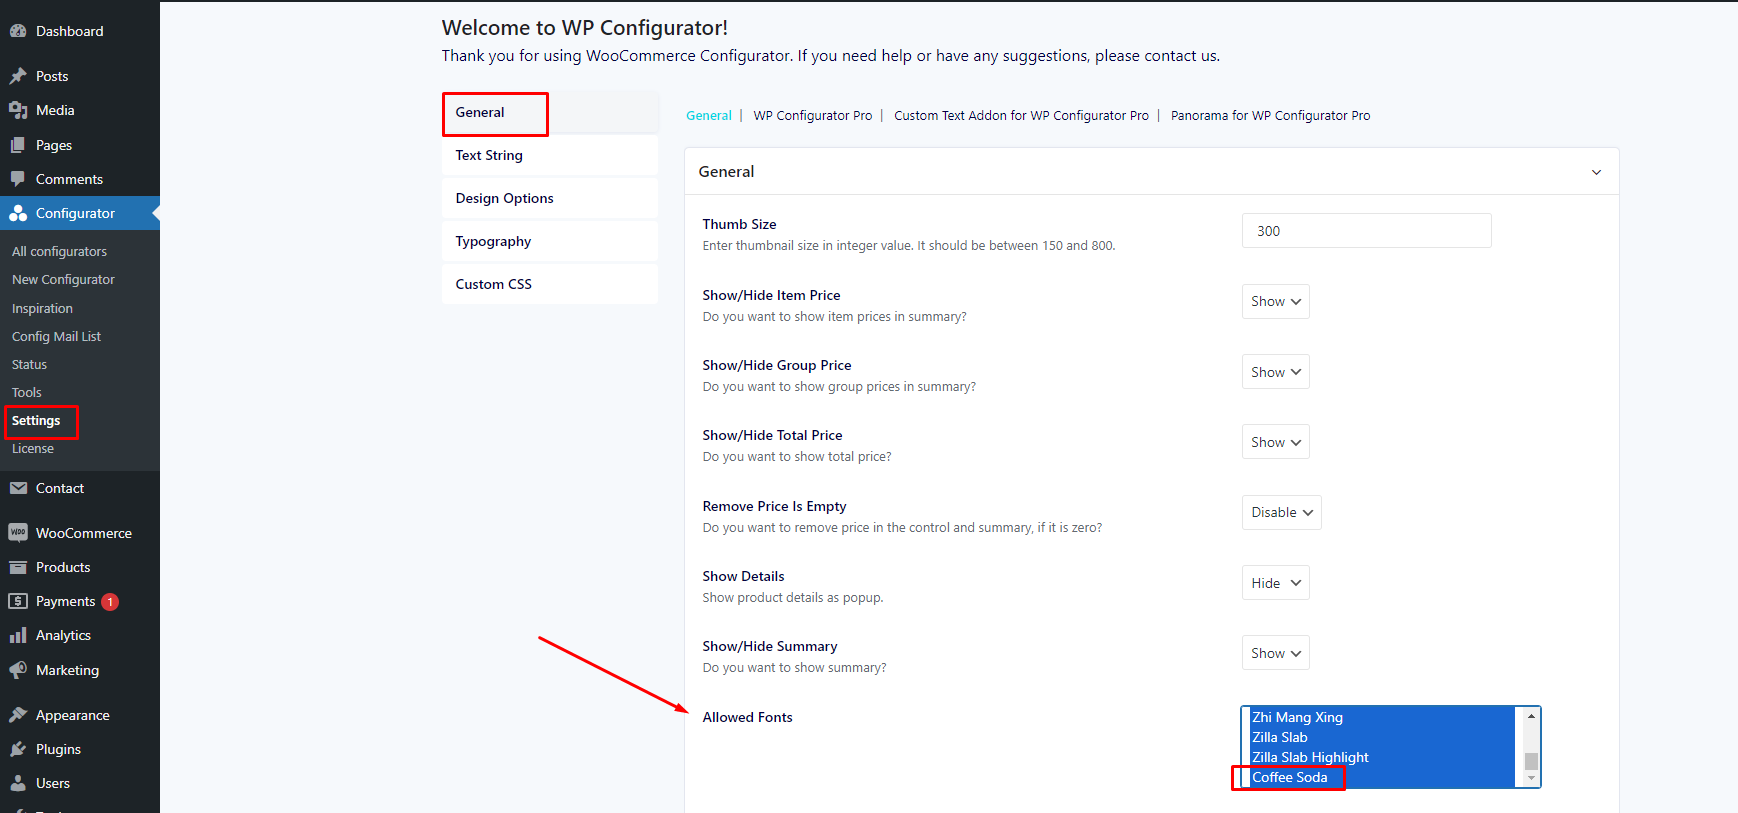
Lastly, you may check your uploaded custom font on Configurator > Settings > General > Allowed Fonts. Please make sure you select the custom font otherwise it will not be displayed on Configurator Editor.
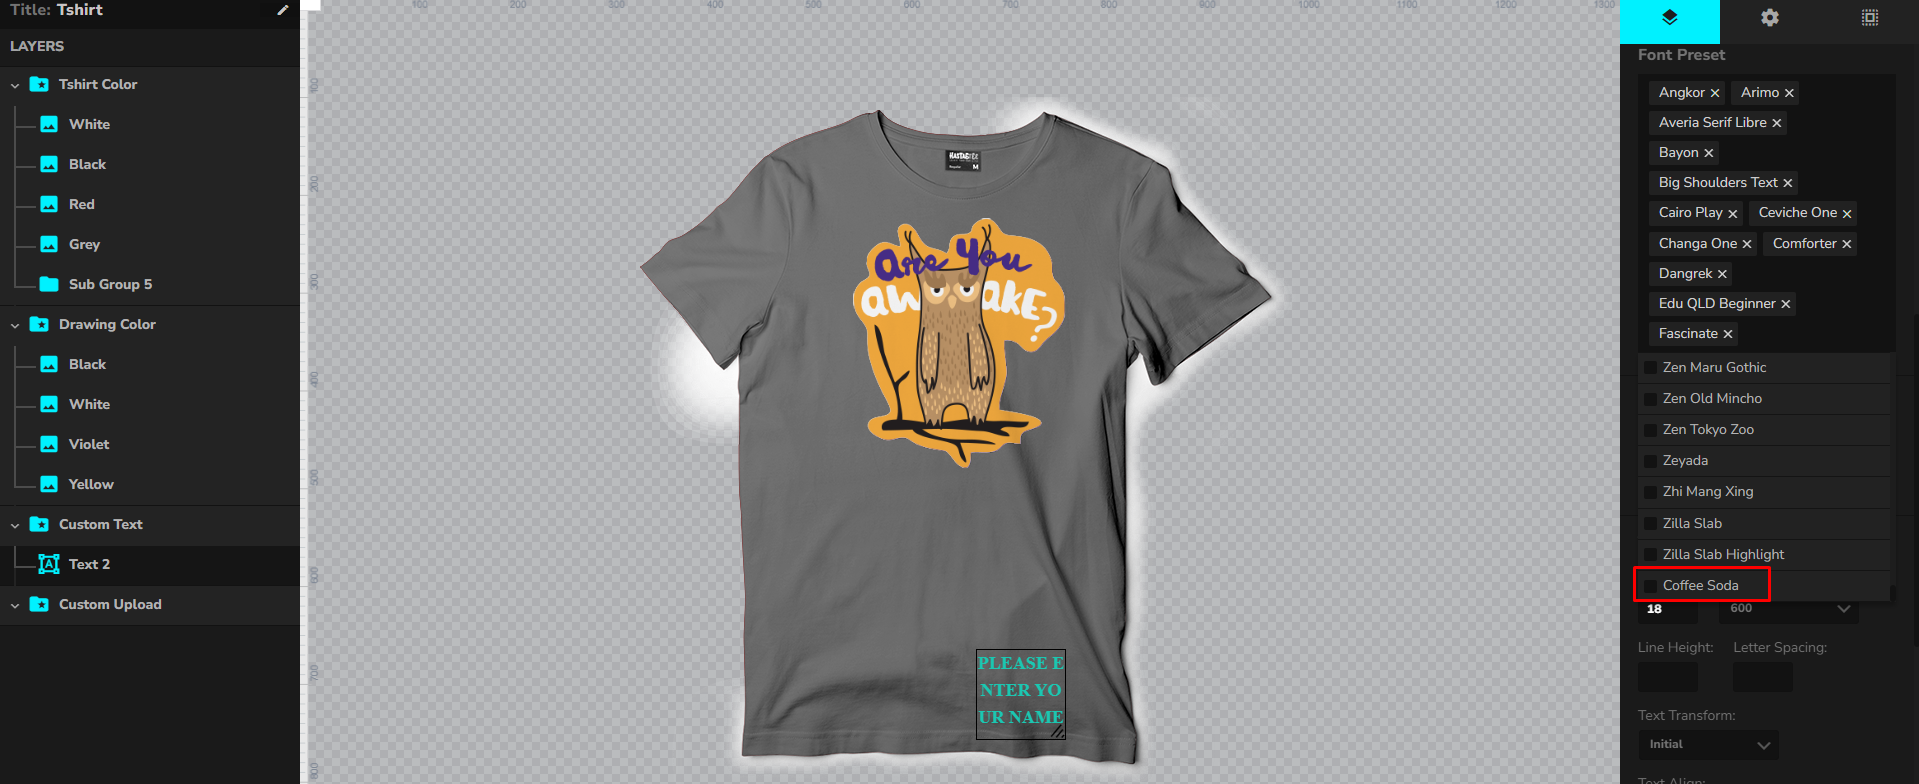
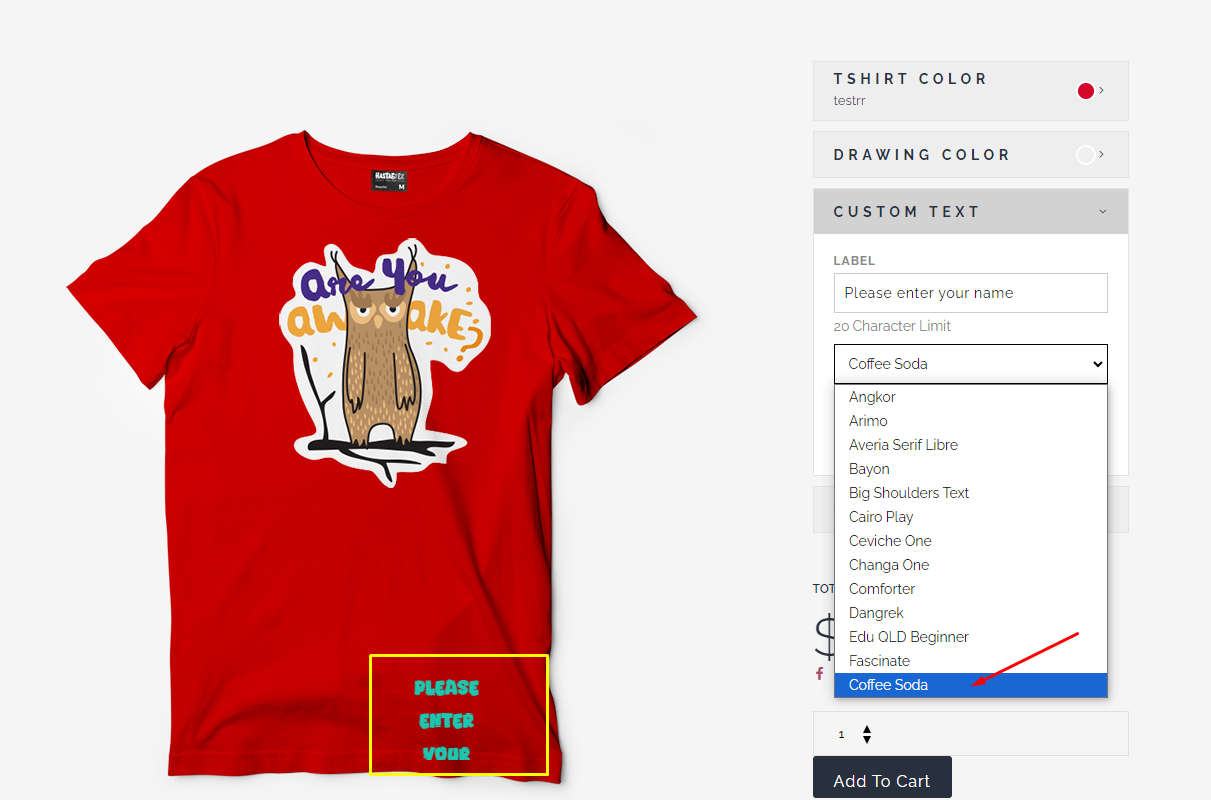
This is what will display on your Configurator Backend Editor and Front-end Interface:
BACKEND:
FRONTEND:

