Create Custom Fields
Before you can assign custom input fields to a configurator, you need to create them first.
- In the WordPress dashboard, go to Configurator → Custom Fields.
- Click Add New and give your custom field group a title (e.g., Helmet Extra Fields).
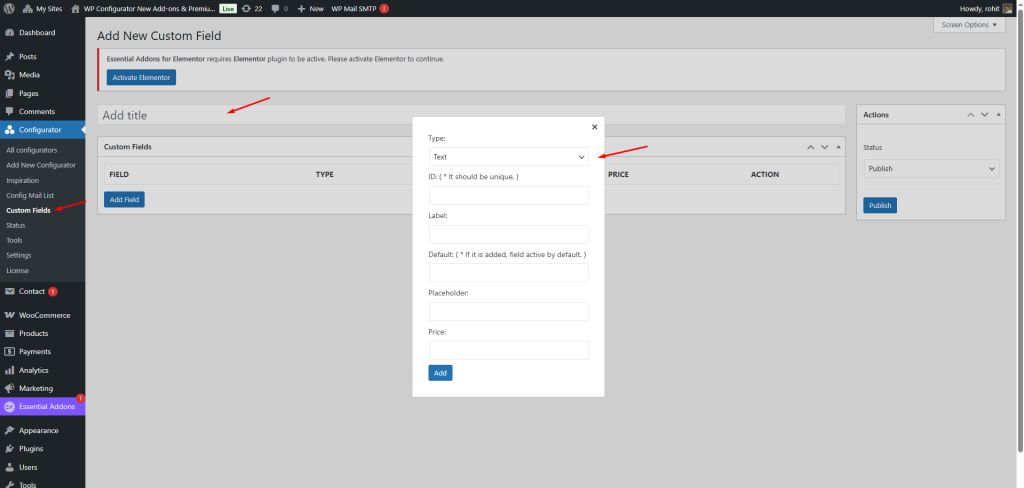
- Click Add Field to define a field. A popup will appear where you can configure:
- Type – Choose from Text, Textarea, Select, Radio, or Checkbox.
-
- ID – A unique identifier for the field.
- Label – The field’s display name.
- Default – Optional pre-filled value.
- Placeholder – Helpful text shown inside the input field.
- Price – Extra cost that will be added if this field is filled or selected.
- Once done, click Add. Repeat for as many fields as needed.
- When finished, click Publish to save your custom fields group.
Assign Custom Fields in the Configurator Editor
Now that your fields are created, you can attach them to a configurator product.
- Go to Configurator → All Configurators and open the product you want to edit.
- In the Layers Panel, create a new layer (e.g., Form 1) where you want the custom input to appear.
- On the right-hand settings panel, expand Custom Fields Addon.
- Select the previously created custom field group from the dropdown.
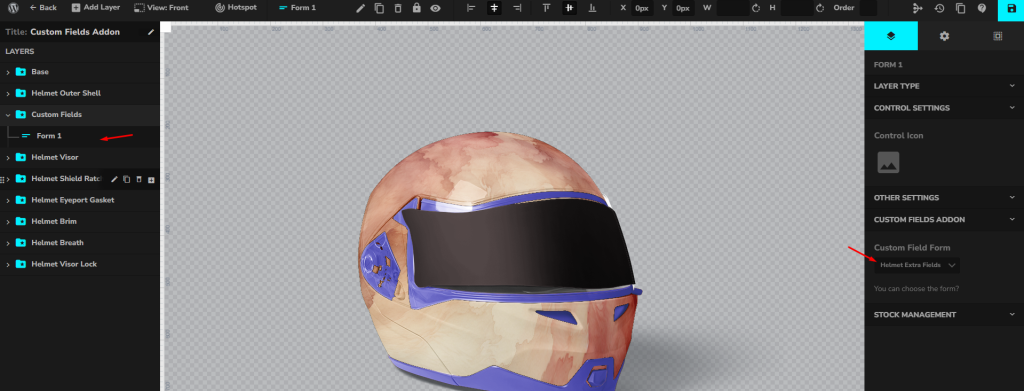
- Save your configurator.
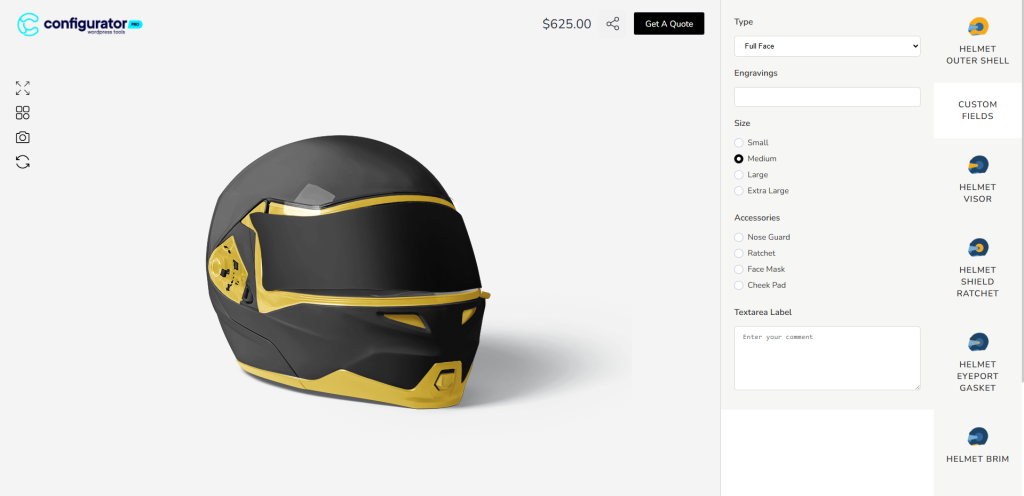
Your customers will now see the custom input fields when interacting with the product configurator.