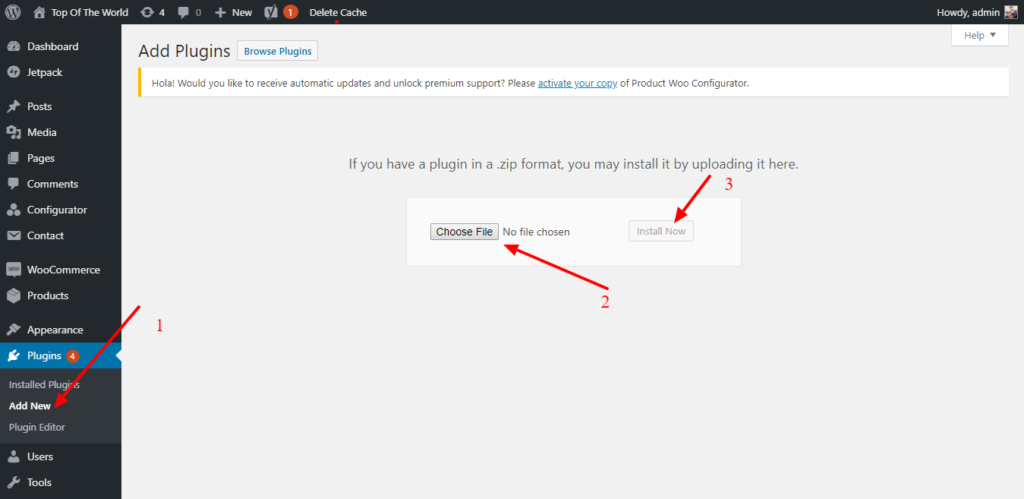
Here, the same way you installed WP Configurator. Just download the zip file you received and upload it into your WordPress Admin Dashboard. Go to Plugin> Add New> Upload New> Upload the zip file as shown here:
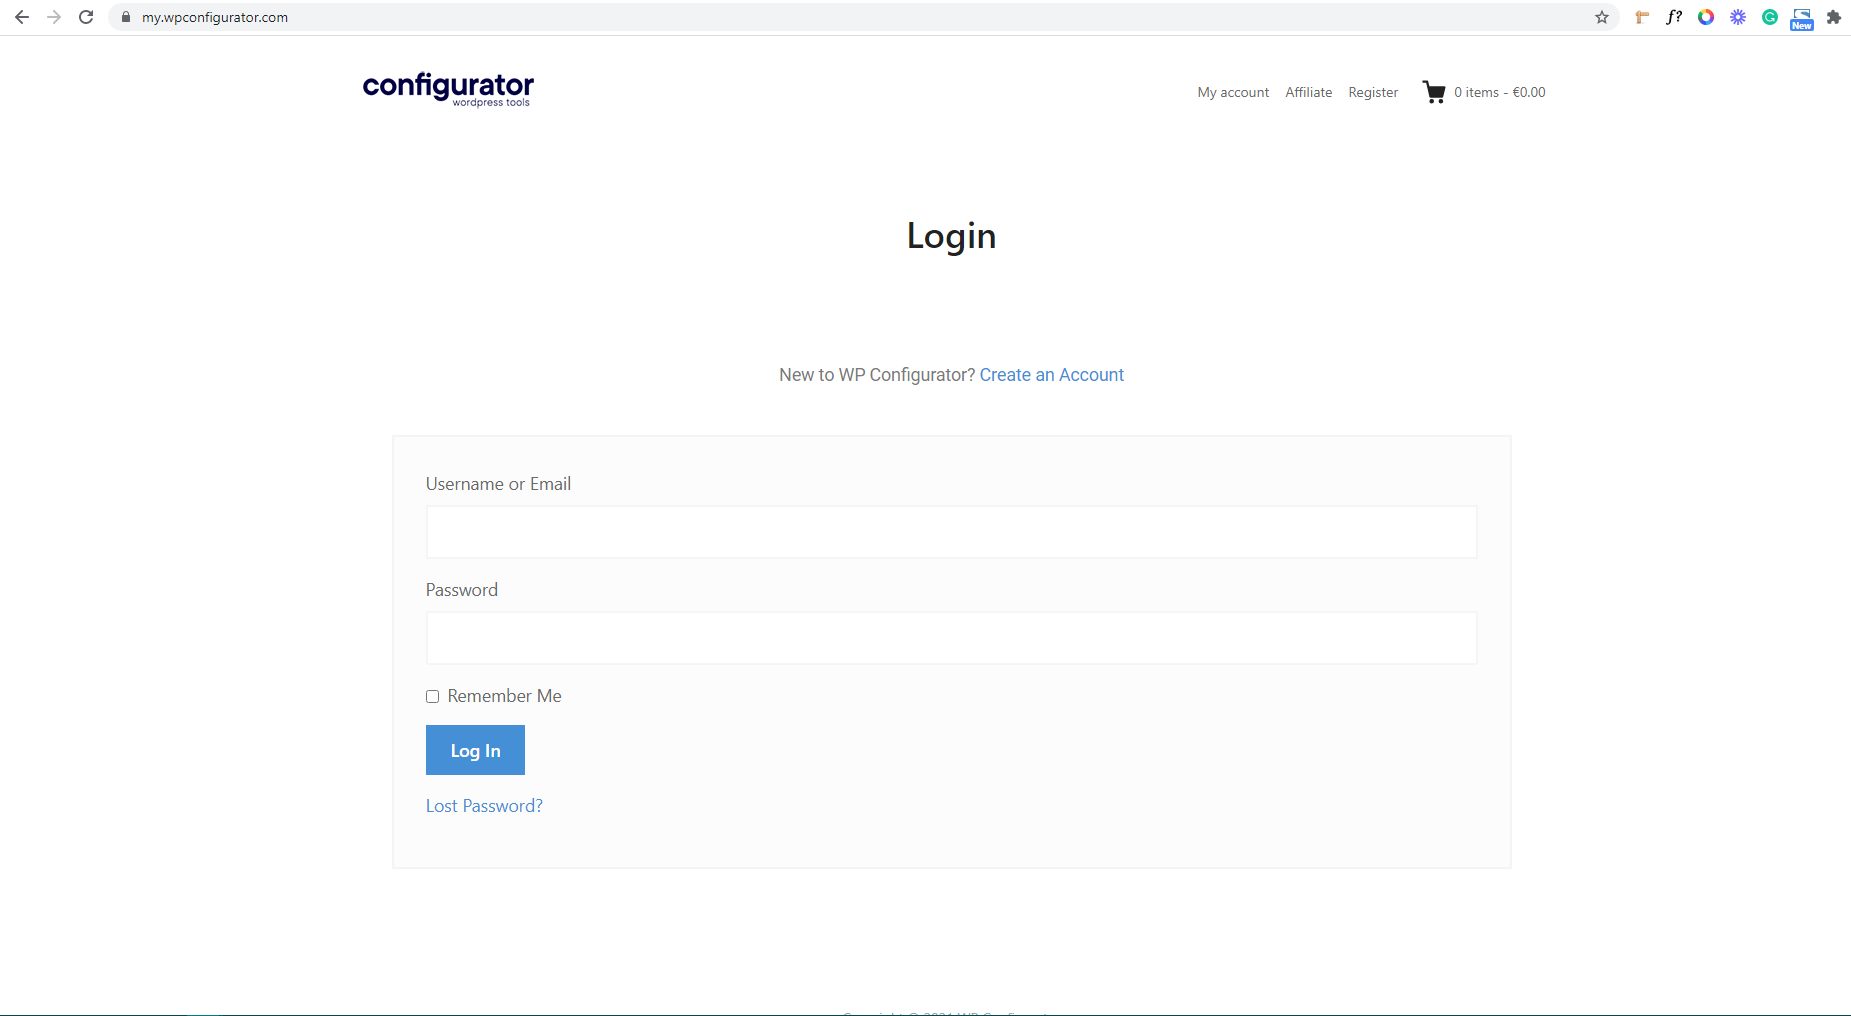
Then click on the Activate plugin button. The next thing to do is to add the license key, You need to activate your License key, You go to https://wpconfigurator.com/ click the My Account first.

And it will redirect you to this URL: https://my.wpconfigurator.com/ then you will need to log in your credentials:
After you log in, it will redirect you to ‘Dashboard’
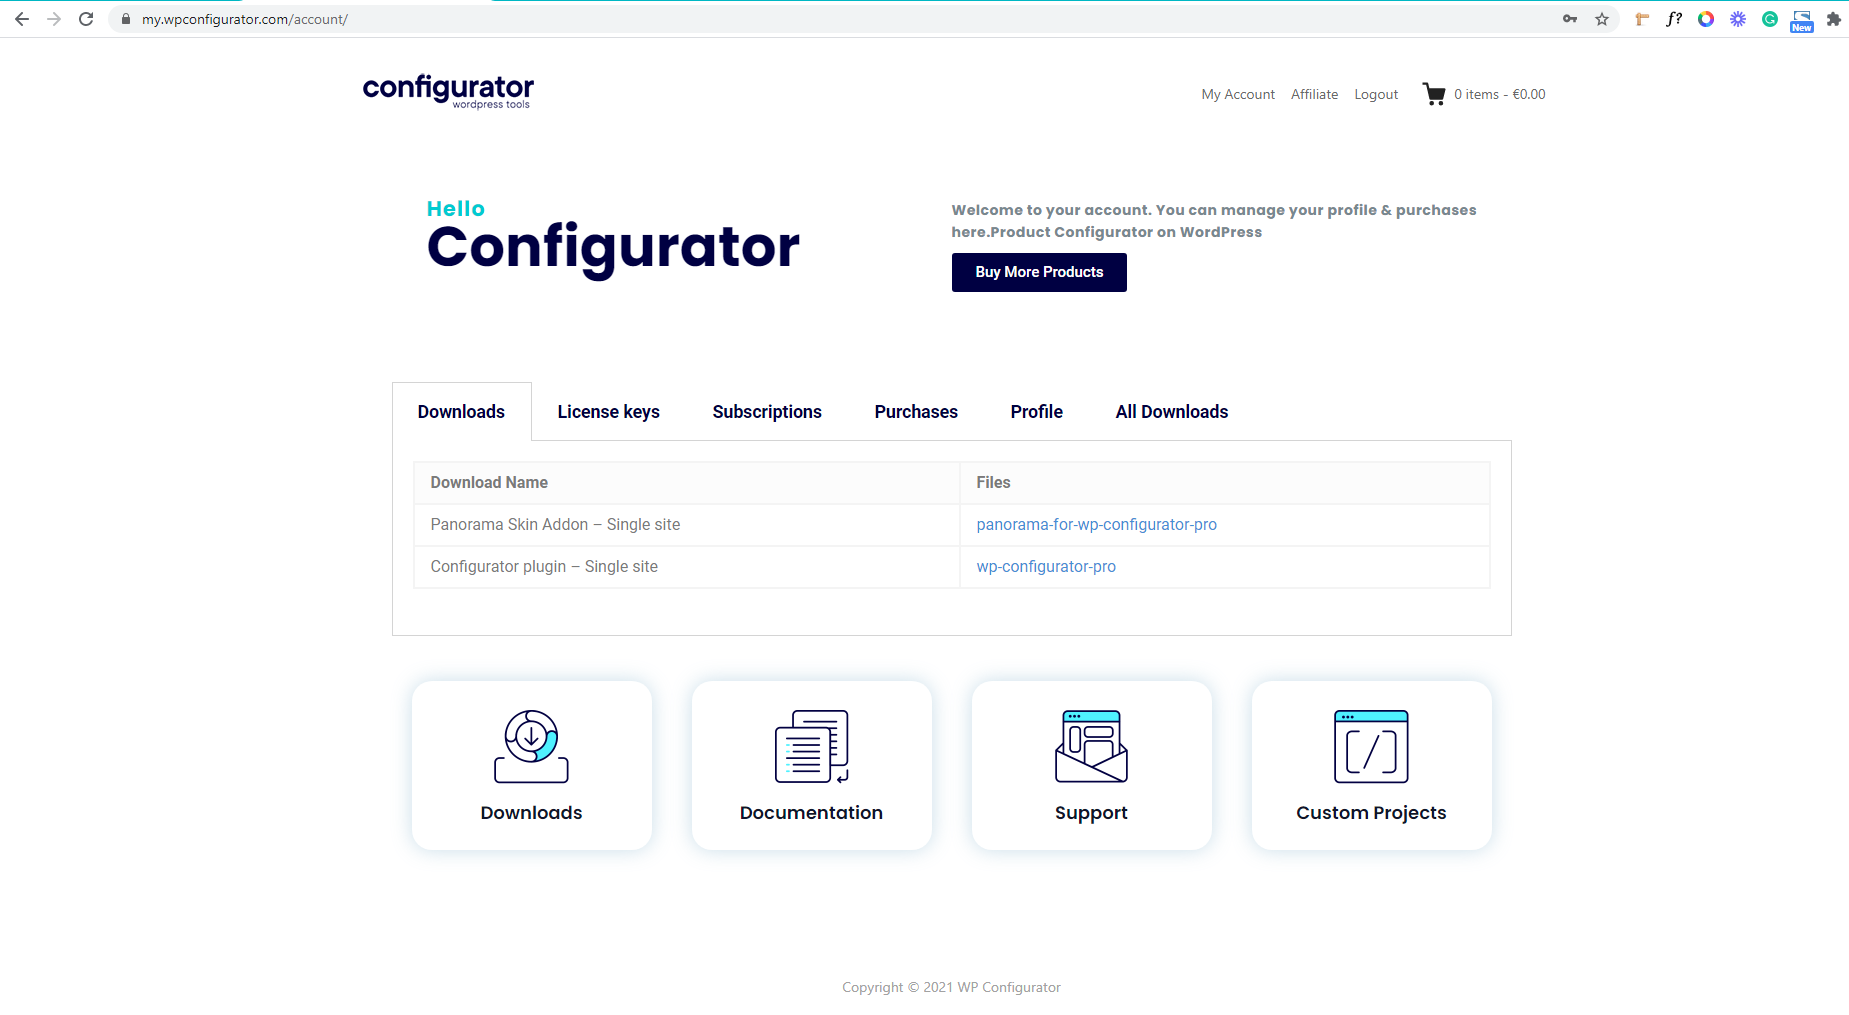
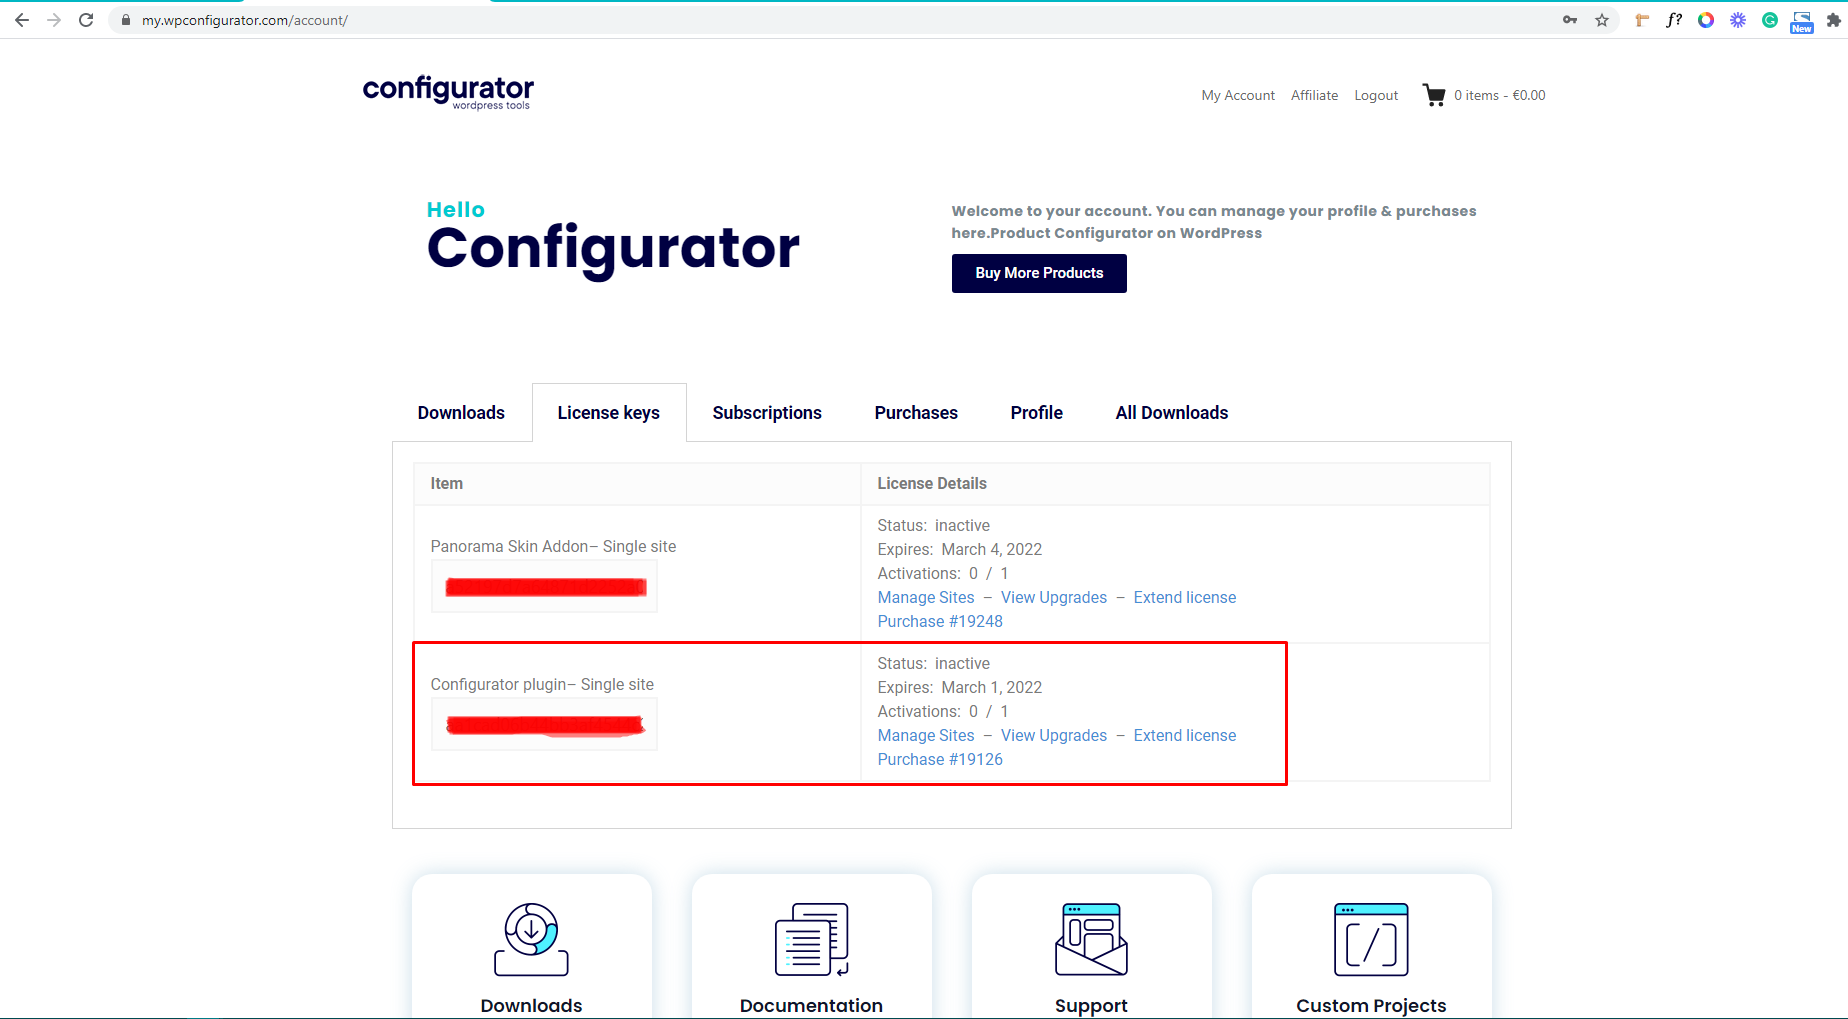
In the dashboard, you need to click the ‘License key’ tab and there you can see the License Key of WP Configurator Plugin
After getting your license key from the Luminestheme site, you go back to the plugin license on your site. Or you navigate to, ‘Appearance’ then click ‘Plugin License’ and paste your license key on the License Key field and click ‘Save Changes’
Once saved, it will add a new button after the field named ‘Activate license’. Click on the button to activate your license.

Once activated, the button will turn into ‘Deactivate License’. If you wish to deactivate your license, you can click deactivate anytime.
If you also want to renew your license you can just go back to your Licenses option, then you will see the Extend License button in Overview column. Please see screenshot below:
And that’s it, you are ready to use Configurator with Elementor Page Builder.

Note: The screenshots above are the only example images of the process of how to install and activate the license key.